The default web URL for setting up and configuring a Wavlink WiFi extender is WiFi.Wavlink.Com. To configure the extender, a user can either use the WPS switch or the login URL wifi.wavlink.com. One of the most dependable and reasonably priced range extenders on the market is the Wavlink WiFi range extender. Your wireless extender can be configured as an access point or a repeater.
Your extender and wireless router can cooperate to produce an extended wireless network through the Wavlink setup process. You must log into the Wavlink extender before beginning the WiFi extender configuration.
You can find complete setup and configuration instructions for the Wavlink extender on this page. Please take the measures extremely seriously.
wifi.wavlink.com: Extender setup
- Turn on your Wavlink extender after unpacking it.
- Place the extender near the main router.
- Watch for your booster’s firm power light.
- Utilise a smart device.
- Select the WIFI option in the settings menu of your WiFi device.
- Setup the Wavlink extender, set up EXT and connect to it.
- Visit WiFi wavlink.com.
- Now that the new extender setup page is open, you can view it.
- Wavlink extender configuration is done by following the instructions on the screen.
Wavlink WiFi extender setup via WiFi.wavlink.com
The private website address WiFi wavlink.com is used to set up the Wavlink range extender. The Wavlink range extender configuration instructions are explained here, so you can easily follow them to complete the configuration. Please carefully follow the steps:
- First, use a web browser to input the Wavlink login URL.
- Make sure your extender is turned on and connected to your computer first.
- Next, open a web browser on your computer and enter the default URL.
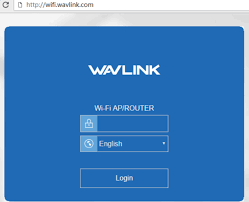
- In the address bar, type wifi.wavlink.com and press Enter.
- You will then go to the Wavlink login page.
- Type in the extender’s username and password for the Wavlink login.
- Press Login. You will be redirected to the Wavlink WiFi extender setup wizard by the web browser.
- To complete the configuration of your wireless range extender, follow the on-screen instructions.
- The extender will then attempt to establish new settings when you click Save.
Wavlink WiFi extender setup via WPS
You must use the WPS buttons on your extender and router to employ this strategy. Your router should have a WPS button to initiate the procedure:
- First, make sure that both the extender and the router are turned on.
- Place the two gadgets next to one another after that.
- It is necessary for the Wavlink WiFi range extender to be in active mode.
- Your WiFi range extender’s WPS switch must be pressed once. Wait a short while.
- Go to your wireless router next. Within two minutes, hit the WPS button one again.
- Allow the router and the extender some time to automatically configure themselves.
- The Wavlink WiFi extender configuration will be finished at this point.
How to login after Wavlink WiFi extender setup
You can log into Wavlink whenever you want after setting up your device. Use wifi wavlink.com as the default web address to access the Wavlink WiFi extender. You may find some of the login procedures for Wavlink extenders in this section.
- First, make sure the computer or laptop is linked to the Wavlink WiFi extender.
- Open your device’s web browser after that.
- The homepage of your web browser will then appear.
- Enter the default web address, wifi.wavlink.com, in the address box.
- You will be taken to the Wavlink WiFi login page after pressing Enter.
- You must now enter your Wavlink login information in the appropriate field.
- Please click the Login button.
- You will finally be logged into the
- Finally, you will have successfully signed into the Wavlink WiFi range extender.
How to update firmware after the Wavlink WiFi extender setup?
You must sign in to the Wavlink WiFi extender in order to upgrade the firmware on your extender. To begin with, follow the login instructions to access your Wavlink deviceThen, you can do the following actions:
- Log in to the Wavlink WiFi extender first.
- You must go to either Advanced or Maintenance after logging into the Wavlink WiFi extender at wifi.Wavlink.com.
- Find the Firmware Update page after that.
- After selecting Firmware Update, follow the on-screen directions.
- Your wireless range extender will enter the UPDATE mode when you click Update.
- As your smartphone completes the update, wait a short while.
- Make careful to reboot your Wavlink WiFi extender after the upgrade is complete.
How to reset the Wavlink WiFi extender?
You must return your device to its factory default settings in order to reset the Wavlink WiFi extender. Only a reset button can be used to return the device to its factory default settings. You may learn how to reset the Wavlink WiFi extender by following the procedures we’ve described in this section of the page.
- Make sure your extender is turned on first.
- Find the reset switch or button on your gadget.
- Once you’ve located it, press and hold the reset button for around 10 seconds.
- Your extender’s main light will then start flashing.
- Press and hold the reset button on your Wavlink extender while you wait a short while.
- When the extender is resetting to its factory default settings, kindly do not switch it off.


