Picture this – you’re about to make a very important phone call when suddenly your cell phone dies. What do you do now? If you’re like most people, the next step is a frantic search for a solution. The good news is that cell phone diagnosis and repair doesn’t have to be so intimidating.
This article serves as your go-to guide for understanding how to diagnose and repair any issue with your device. We’ll walk through each step of the process, from identifying the problem to replacing any necessary components. Having an understanding of what may be wrong with your device can save you time, money, and stress in the long run.
Ready to dive into our step-by-step guide? Read on to get started!
Safety Precautions For Cell Phone Repair
When it comes to phone repair, safety should be your number one priority. Before attempting any repairs, it is important to take certain precautions. First and foremost, make sure that you are working in a static-free environment. This means using an anti-static mat or wrist strap to avoid electrostatic discharge. Additionally, turn off the device before repairing it and remove the battery if possible. It is also important to keep track of all the screws and other parts that could be used for reassembly.
In order to protect yourself from electrocution, use an insulation mat when working with live circuits and test points on the device. In addition, wear appropriate clothing such as rubber-soled shoes and don’t touch any metal components while you work on the phone. Taking these steps will help ensure a safe repair process and minimize the risk of damage to your device or injury to yourself.
Identifying The Problem
Before beginning any repair, it’s important to identify what the problem is. This can make all the difference in determining the best course of action for restoring the cell phone to working order. To do this, take an inventory of what is happening with the phone. Is it not charging correctly? Is there a broken part or physical damage? Are certain functions not working properly? All of these are important clues in helping you pinpoint the issue.
Once you have an idea of what might be wrong, it’s time to start troubleshooting. You may need to check for software updates and reset your settings, or even open up the phone itself and inspect its components. With some detective work, you should be able to figure out exactly what needs to be done in order to fix your cell phone.
Gather the Required Tools And Supplies
Before proceeding with the repair, it’s important to gather the necessary tools and supplies. This step is crucial in ensuring that the repair is successful and efficient. Depending on the type of phone, you may need a Phillips or flathead screwdriver, tweezers, a plastic opening tool, a small suction cup, a SIM card removal tool, and other replacement parts.
Assemble all these items before you begin repairing the phone. If any of these items are missing, it will delay the repair process and potentially cause further damage to your device. Make sure you understand exactly what each tool is used for so that you can apply them properly during repair.
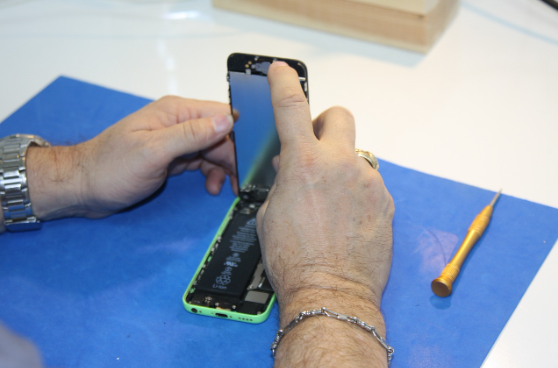
Disassembling The Cell Phone
Now that you’ve gathered the supplies you need, it’s time to start disassembling the phone. This is an important step since it will allow you to access the internal components of the device. It’s important to be careful when performing this task; if done incorrectly, it can cause damage or make repairs more difficult.
Make sure you follow all instructions carefully and take pictures along the way so you can easily refer back to them while reassembling your phone. Pay extra attention to any screws and clips that may have been removed; these pieces are essential for properly putting your device back together. Failing to place them in their correct locations could potentially cause even more damage!
Cleaning And Troubleshooting Internal Components
Now that the cell phone has been successfully disassembled, the next step is cleaning and troubleshooting internal components. This process requires a careful eye and an understanding of how all the different components in a cell phone work together.
It’s important to clean every single component of the device, including both electrical and non-electrical parts. Doing so can help uncover any issues that may be present with individual components or how they interact with one another. Furthermore, this allows for a greater understanding of how each part works and which parts need replacing if required. Once the cleaning process is complete, it’s time to begin troubleshooting any potential issues with the device’s internal components. This could involve running diagnostics tests or performing an in-depth analysis of each component and its relation to other parts of the device.
Understanding and resolving potential problems with each component will ensure that your cell phone runs optimally when reassembled.
Testing And Replacing Internal Components
Now that we have cleaned any potential internal components, it’s time to test and replace them. Testing internal components is a crucial step in cell phone diagnosis and repair. This process involves checking for any faulty components that may be causing the issue. It also helps identify if a component needs replacing or not.
Replacing an internal component can be done by taking out the old one and inserting a new one. Care should be taken when doing this as improper placement can cause further damage to the device. It’s important to note that every device requires different tools, so depending on the model, you’ll need to make sure you have the right ones for your job. With the right tools in hand, you can complete this step without worry.
Diagnosing And Updating Software Problems
The next step in diagnosing and repairing a cell phone is to diagnose and update software problems. Software issues can be difficult to identify and address, but are sometimes the root cause of certain malfunctions. To determine if a software issue is causing the problem, you can check for updates or run diagnostics.
If an update is available, it should be installed immediately as it may fix the issue. If no update is available, then running diagnostics on the device may help to identify any potential software problems. Once identified, you may need to reinstall or reconfigure the affected software components in order to resolve the issue.
In short, when attempting to repair a cell phone, it’s important to first check for updates and run diagnostics before attempting more complex repairs such as replacing internal components. Taking these steps will help ensure that any potential software issues are identified and remedied quickly.
Reassembling The Cell Phone
Now that the software issues have been diagnosed and updated, it’s time to reassemble the cell phone. This is a crucial step in the diagnosis and repair process because if the phone is not reassembled correctly, it can cause additional damage. To ensure that this step is done properly, it’s important to ensure all pieces are securely fastened before powering on the device.
Start by making sure all parts have been returned to their original positions. Then make sure any screws or pins that were removed for access have been replaced securely. Double-check all connection points to make sure they are snug and secure. Finally, power on the device to check all functionality has been restored. If any issues remain, review each step of the repair process again to see where an error may have occurred. With careful attention and patience, the cell phone should be ready for use!
Testing The Repaired Cell Phone
After having disassembled and repaired the cell phone, it’s time to test it. This step is critical; if the device isn’t functioning correctly, then all of the effort put into reassembling it would have been for naught. To ensure a successful outcome, there are a few tests that need to be conducted.
First, plug in the device and make sure it starts up properly. Then, check each of its functions one by one. This includes checking that the buttons work correctly and that all of the features are functioning as expected. Once this has been done, then you should run a battery test to make sure everything is working as it should with regards to power consumption. If all goes well, then your repair was successful!
Maintaining Your Cell Phone
Now that the cell phone has been repaired, it’s time to maintain it. This involves taking certain steps to make sure the phone stays in good condition so that you don’t have to do any more repairs in the near future. The first step is to keep the phone out of direct sunlight and away from extreme temperatures. This will protect its battery life and other components. Additionally, avoid dropping or subjecting your device to shock or water damage, as this can cause serious damage if not taken care of right away.
You should also be mindful of how much you use your device and how often you use it. For example, if the phone gets too hot while using it, stop using it for a while until it cools down again. Finally, make sure to clean your device regularly with a soft cloth and mild soap and water solution. By following these tips, you’ll be able to keep your cell phone working properly for years to come.
Conclusion
When it comes to cell phone repair in Vancouver, the most important thing is to take your time and be careful. If you rush through the process or don’t follow safety procedures, you could damage your device further or even hurt yourself. With these tips, you should be able to diagnose and repair a wide range of cell phone issues.
The key is to identify the cause of the problem before attempting any repairs. Once you know what’s wrong, you can gather the necessary tools and supplies, disassemble the cell phone, troubleshoot any internal components that may be causing an issue, diagnose software problems if needed, reassemble the device and test it out.
Taking care of your cell phone doesn’t stop once it’s been repaired. To ensure that your device functions properly for years to come, make sure to clean it regularly and update its software when necessary. Following these steps will help extend your cell phone’s life and keep it in top working condition.
Also read: From Catering To Private Chef: Making The Transition